Spring Break may be just starting in your part of the world, and I hope you are enjoying this time to soak in all the beauty and renewal the season comes with.
I hope you are catching up on family time, cooking up a homemade meal or two, or simply setting aside everything and taking the time to just be.
For us, Spring Break happens a little early but also ends a little too soon — it was over last Sunday. It never seems to last long enough!
We relished the break to the fullest. We walked, played, and spent many ditzy hours around the house. And yes, we cooked, baked, and ate. A lot.
I liked these quinoa patties so much, I wanted to try something similarly delicious and convenient.
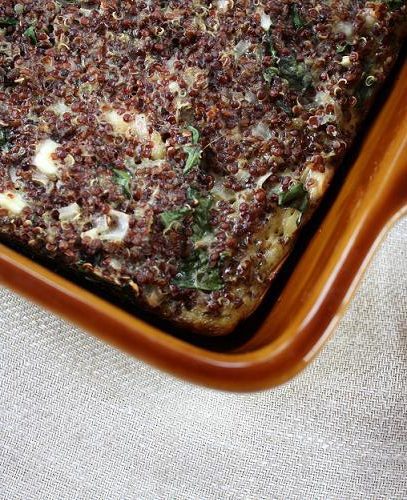
Baking quinoa in cake form provided even more peace of mind as I was able to quickly mix the ingredients, stick the pan in the oven, and walk away.
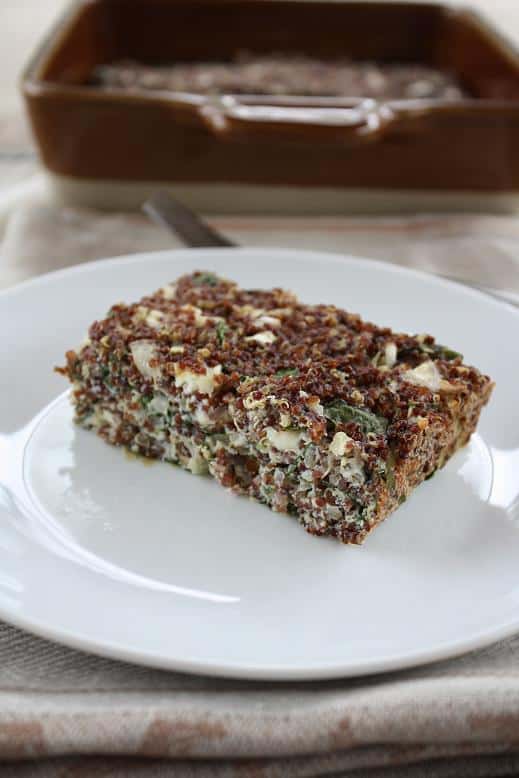
Quinoa lunches are addictive. For me, it’s the combination of good, delicious, practical, and easy that makes them so appealing. I also love that they reheat instantly into a fresh-tasting meal.
Who said homemade can’t be convenient?
Baked Quinoa Recipe
YIELD: 6 SERVINGS
PREP TIME: 20 MIN
COOK TIME: 40 MIN
Ingredients:
- 1 cup red quinoa
- 2 cups water
- 2 shallots, minced
- 2 garlic cloves, minced
- 1 cup chopped Swiss chard
- ½ cup crumbled feta cheese
- 3 large eggs, beaten
- 2 tablespoons olive oil
- 1 teaspoon harissa or other hot sauce, optional
- 1 teaspoon baking powder
- Fine sea salt and ground black pepper, to taste
Directions:
Combine the quinoa and water in a saucepan and bring to a boil.
Reduce the heat to low, cover with a lid and cook for 15 minutes.
Remove from the heat and let cool to room temperature.
Preheat the oven to 375 degrees Fahrenheit. Spray an 8 x 8 pan with cooking spray.
Place the cooked quinoa with the rest of the ingredients in a large mixing bowl.
Stir well to combine. Pour the mixture into the prepared pan.
Bake the quinoa until set and somewhat crispy on the surface, 40 to 45 minutes. Let cool a bit before cutting.